
Router Admin Access 192.168.4.1
To access your router admin panel:
- Type 192.168.4.1 in your web browser’s address bar
- Or click one of the links below:
*This IP address will only work if you’re connected to the same network as your router.
Your current IP: Detecting…
What is 192.168.4.1?
Many people don’t realize that 192.168.4.1 is not just a random set of numbers. It’s actually a private IP address used to access the configuration page of your router. I’ve used it myself when trying to manage my home network settings. It’s part of a range of IPs that the Internet Assigned Numbers Authority (IANA) has assigned for use in Local Area Networks (LAN). This means the wider internet can’t use it, which helps secure your connection.
This default gateway allows devices on your LAN to talk to the router without going through the WAN or internet side. If you’re setting up a new hardware connection, you might see 192.168.4.1 in the instructions. Just type it into your browser and enter your username and password to begin managing settings. Since IANA registers this IP in its private block, so only you and others on the same Local Area Network can use it—making it ideal for managing connections in your home or office.
Also Read Our Article: Ping IP Tool: Test Network Connectivity Fast
Devices That Use 192.168.4.1
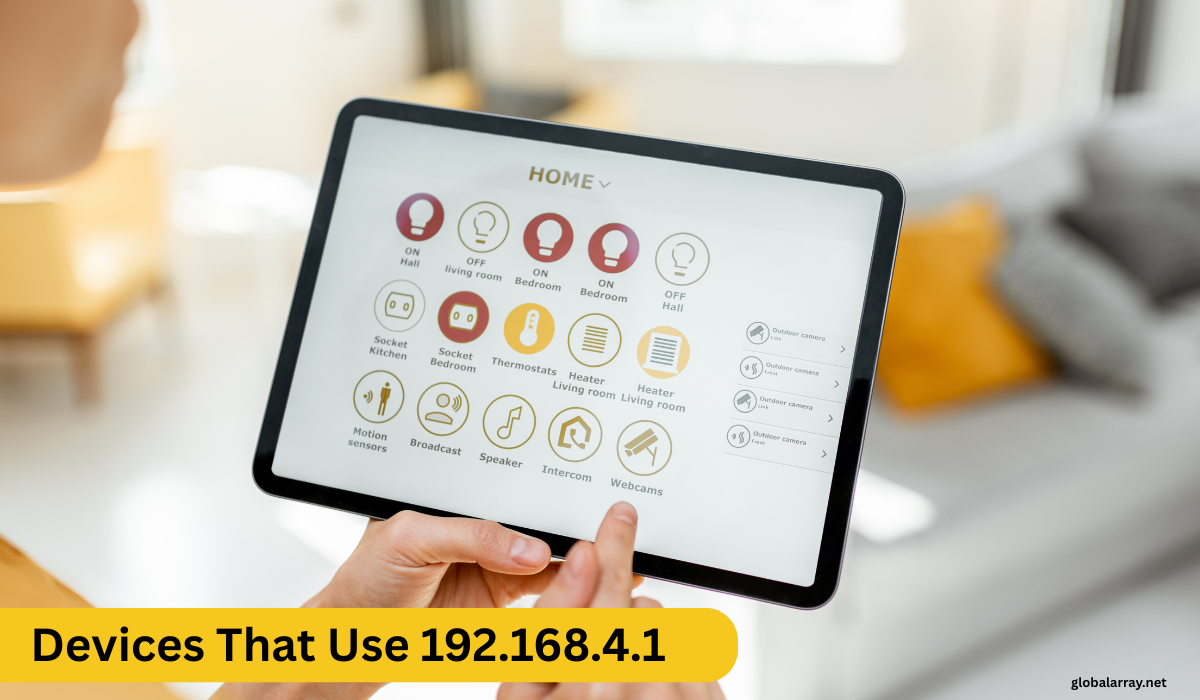
The 192.168.4.1 IP address is mainly used by routers to set up and manage local networks. When you need to access your router’s settings, you’ll likely use this IP address. Devices such as smartphones, computers, and smart TVs within your home network connect to the router via 192.168.4.1.
Purpose of Private IP Addresses
Devices use private IP addresses like 192.168.4.1 to communicate within a specific, private network.These IPs are not visible on the internet, which helps to keep your devices secure. They’re unique to your local network, but not to the internet as a whole, which helps manage traffic and security within your home or office.
192.168.4.1 vs Other Common IPs (e.g., 192.168.0.1, 192.168.1.1)
192.168.0.1 and 192.168.1.1 are other common private IP addresses that are used by different routers. While 192.168.4.1 is also a private IP, the main difference between these addresses lies in the final number. These IPs allow local devices to communicate with the router, and while they are slightly different, they all belong to the same private IP range used for internal networks.
Router Brands That Use 192.168.4.1
In my experience setting up different routers for home and small office networks, I’ve come across several brands that use 192.168.4.1 as their default gateway. Some well-known manufacturers like Tenda, Alfa, ZTE, and Vivotek often assign this IP address to their routers for easy access to configuration settings. This simplifies the process for users to connect and fine-tune networks using a browser.
Other router brands like Huawei, TP-Link, DrayTek, Linksys, and D-Link also occasionally use 192.168.4.1, depending on the types of devices and firmware provided by the manufacturer’s team. Always check the documentation or sticker on your hardware for the exact addresses used. If you’re unsure, a quick call to support can help or even using an IP scan tool can run a complete list of connected devices on your network. These setups usually go smoothly once you reach the point of accessing the gateway.
Popular USA Router Brands (Xfinity, Spectrum, etc.)
Several well-known internet service providers (ISPs) in the USA offer routers, such as Xfinity and Spectrum. These brands provide routers that allow you to connect your devices to the internet. Both companies offer options to rent or purchase routers for your home network. Many people use popular router brands like Netgear and TP-Link to set up and manage home networks, connecting devices such as computers, smartphones, and smart TVs to the internet.
How to Login Using 192.168.4.1
To start, make sure your computer or mobile is properly connected to the router via Wi-Fi or Ethernet wire. Some routers, like those from Linksys, use this IP for administration. When the page loads, the system prompts you to enter a username and password—details usually printed on your device or included in the manufacturer’s documentation.
If you’re logged in successfully, you’ll see the panel where you can configure settings like WLAN, DNS, proxy, and QoS. From here, you can manage networks, change security protocols, block users, set port forwarding, or even change your network settings. Administrators or your IT team mostly use these functions, but anyone who follows the correct steps can use them. If you’re unsure, most routers have a help section or online support.
Default Login Credentials
When I first helped a friend set up his router using the IP address 192.168.4.1, we couldn’t move past the login screen because he didn’t know the default login credentials. Most routers use “admin” for both the username and the password, although some brands set the password to something like “1234” or leave it blank with a dash “-” as the default.
Before you try random inputs, always check your router’s label or manual. You’ll usually find the username and password printed right on the back. If those don’t work, there’s a good chance someone changed them earlier. In that case, resetting the router is the only way to get back in using admin and 1234 as the reset defaults.
Step-by-Step Login Process
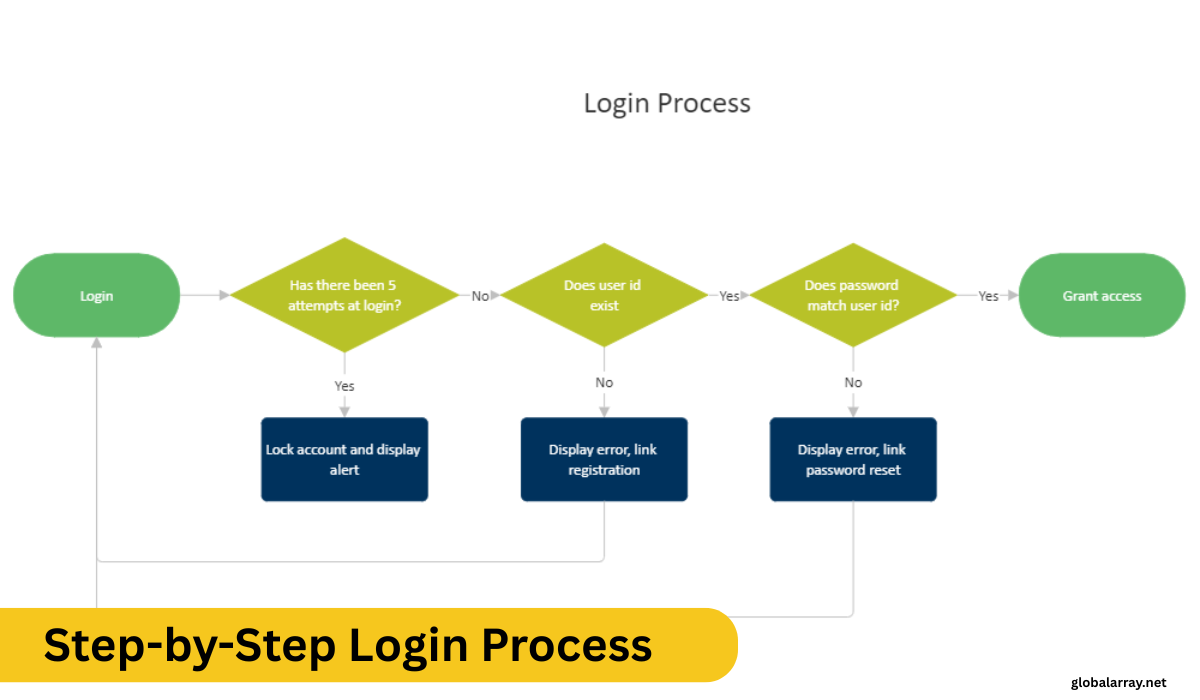
Logging into your router using the IP address 192.168.4.1 is quite simple, especially if you’ve done it under various circumstances like a fresh setup or when checking your security settings. I’ve handled dozens of routers in both home and professional environments, and here’s a method that works consistently. First, make sure your device is connecting to the router either via wireless or wired connection.
192.168.4.1 Login Page Not Loading – What to Do
If the 192.168.4.1 login page isn’t loading, the first thing to check is whether you’re connected to the router’s network, either by Wi-Fi or using an Ethernet cable. If you’re connected and still having trouble, try restarting both your router and your device. Often, a quick reboot can solve the problem.
Setting Up Your Router via 192.168.4.1
When I first got my new home Wi-Fi system, I had to manually open my preferred web browser and type in the 192.168.4.1 IP address in the bar to access the router’s setup page. This local link is a private address, registered by IANA, meaning it only works in your LAN or network. After that, the screen asked for a username and password, which I found on a label stuck under the device. Once entered, I could finally see the configuration options.
Accessing the Admin Panel
To get into your router’s admin panel, first make sure you’re connected to the router, either through Wi-Fi or an Ethernet cable. Then, open your web browser and type 192.168.4.1 into the address bar. This will bring up the login page. To access the settings, you need to enter a username and password, which are often set to ‘admin’ for both by default. If these don’t work, you can check the label on your router or refer to the user manual.
Configuring Network Settings
Once you’re logged into the admin panel, head over to the “Network Settings” or “LAN Settings” section. This is where you can tweak the router’s IP address, subnet mask, and DHCP settings. Most people don’t need to change these settings, but if you’re looking for specific adjustments, this is the place to do it. Be sure that any changes you make fit with your network’s setup.
Setting SSID and Password
To set up your Wi-Fi network, go to the “Wireless” or “Wi-Fi Settings” section. Here, you can give your network a name (SSID) and set a secure password. Make sure the password is strong, using a mix of letters, numbers, and symbols. After making these changes, don’t forget to save them.
Saving and Rebooting
After configuring your router settings, hit the “Save” or “Apply” button to save the changes. Some routers might need to reboot for the new settings to take effect. If prompted, confirm the reboot and wait a few minutes for the router to restart and apply your changes.
Beginner Tips for First-Time Setup (USA-specific)
If you’re setting up your router for the first time in the USA, make sure you have a stable internet connection from your ISP. Wait for the modem to initialize, then power on the router. After that, use your computer or phone to access the router’s admin panel and follow the steps above to configure your network. If you run into problems, refer to the manual or contact your ISP.
Connecting to the Network
When I first set up my router, I learned that taking the right steps makes everything easier. You’ll often see a default network name (SSID) from your new router—connect to it using the default password printed on the back. This is a key step to get inside the router’s admin panel using 192.168.4.1.
Powering the Device
When I first got my new router, I made sure to unbox it carefully and read the manual it came with. The box usually contains the power adapter and a few cables. I placed the device in a high spot in the house, away from walls or corners, so the signals could reach every room. Finding the best position is key—putting it on a shelf or central table worked great for me.
Connecting Ethernet or Wi-Fi
When I first helped a neighbor set up their new home network using the 192.168.4.1 address, the most important step was figuring out how to properly connect the device. You can either plug in an Ethernet cable or go wireless using Wi-Fi. If using a cable, slide it firmly into the adapter port on your router and into the box (your modem or main network hub). For Wi-Fi, make sure the device is within signal range. Once the connection is established, you should see a green light blink, confirming that things are working.
Establishing Internet Connection
When I first got my new router, I thought connecting was easy—until I realized my device couldn’t find the network. First, check that the cables connect correctly, then power on the devices in the proper order. After that, open your browser and visit 192.168.4.1 to begin the setup.But even before that, make sure your connection is actually working.
Troubleshooting Common Issues
I’ve personally dealt with several frustrating situations where the router just wouldn’t cooperate. Sometimes, the connection breaks down, or the browser just refuses to redirect to the admin panel via the IP address like 192.168.4.1. If this happens, don’t panic. The first thing I check is if the IP is typed correctly—it’s an easy mistake. If that’s fine, then I try restarting the router to see if it starts functioning normally again.
Incorrect IP Address
When you try to log into your router using 192.168.4.1, an incorrect IP address can cause a lot of frustration. Many times, it’s a simple mistake of typing in the wrong protocol or even using an outdated IP address. Ensure you have the correct IP address entered into your browser and double-check if your internet connection is active. If the page still doesn’t load, verify the access credentials. If the default login credentials have been altered, you might need to change them. Try resetting your router if necessary.
Connection Issues
When facing connection issues with your router, it’s important to ensure everything is properly plugged in. If you’re using a wired connection, check that the cable between the router and your computer is secure and undamaged. The power indicator should be on, indicating the router is receiving power. If it’s off or blinking, try resetting the router. Make sure your device is within range and the router’s wireless signal is enabled for wireless connections.
Wrong Username or Password
A common issue during router login can be entering the wrong username or password. This usually happens because you either never changed the default login credentials or forgot the updated ones. The first step is to ensure you are using the correct details. You can find these in the router’s manual or on a label on the device itself. If you still can’t get in, you may need to change the password to regain access. In some cases, if the credentials are still unclear, it might be best to contact a technician for support. Always ensure your router’s security settings are up to date to avoid unauthorized access. Be sure to follow the steps outlined in your router’s manual to avoid further issues.
Resetting the Router
If you’re facing issues with your router, resetting the router might be a helpful solution. A hard reset is often the easiest way to fix many common problems. To do this, locate the reset button on your device—usually a small pinhole. Using a paperclip or similar object, press and hold the button for about 10-15 seconds. This will restore the router to its factory state, clearing any custom settings or configurations you’ve made.
Firewall or Security Software Blocking Access
If you’re having trouble accessing 192.168.4.1, the issue might be related to your firewall settings or security software. Sometimes, firewalls can deny access by mistakenly blocking internal connections, which includes access to your router’s login page. You should double-check the firewall settings on your computer to ensure that they are not interfering with the internet connection needed to access the router.
How to Find Your Correct Gateway IP (Windows/macOS)
On macOS, select your current connection (such as Wi-Fi) by clicking the Apple logo, then selecting System Preferences > Network. After selecting Advanced, select the TCP/IP tab. The IP address will appear next to “Router.” The number you enter in a browser is your gateway IP. to open the router page like 192.168.4.1.
Security Tips for 192.168.4.1 Access
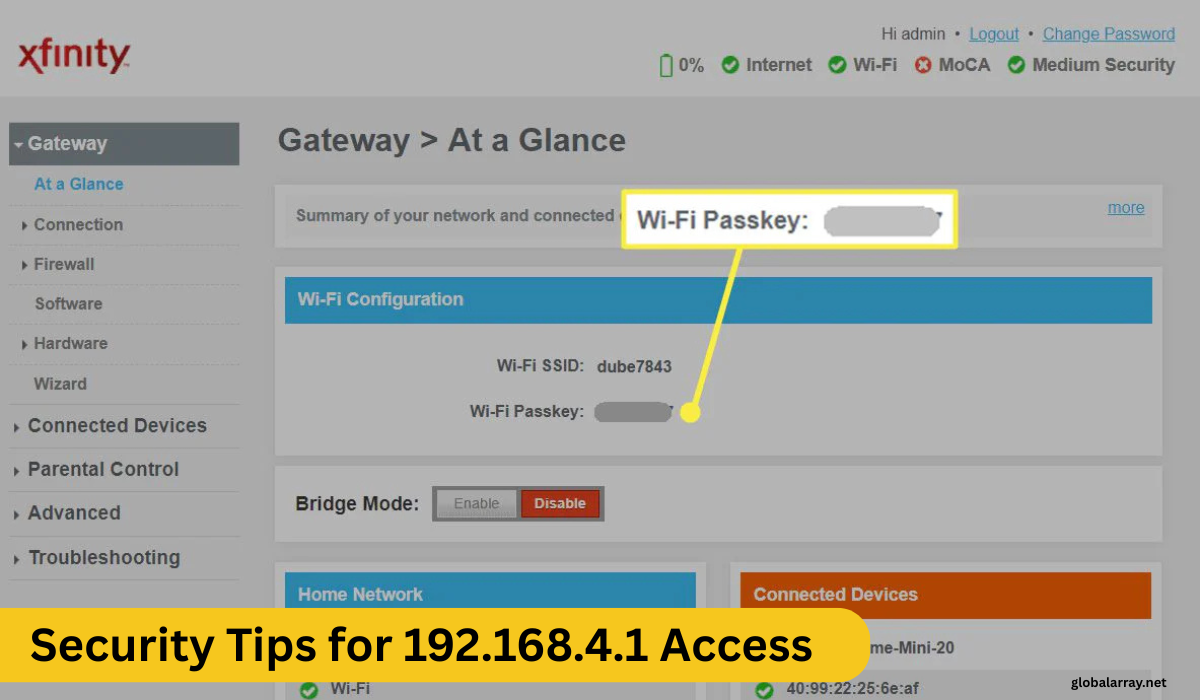
Use a Strong Admin Password
A strong admin password helps block unwanted access to your router settings. Make it long—at least 16 characters—and include a mix of letters, numbers, and symbols. Avoid using simple words or personal info like your name or birthday. Change it every few months to keep your router safe and secure.
Change Default Credentials
Most routers come with default login names and passwords like “admin”. These are easy to guess, which puts your network at risk. Right after you log into your router through 192.168.4.1, go to the settings and update both the username and password to something unique that only you know.
Disable Remote Management
Remote management lets someone control your router settings from another network. That’s risky if hackers find a way in. It’s best to turn off this option in your router settings unless you really need it. This step keeps people from messing with your router when they’re not even in your home.
Enable WPA3/WPA2 Encryption
Make sure your Wi-Fi uses WPA2 or WPA3 encryption. These keep your wireless network safe from people trying to break in. WPA3 is the newest and strongest, but WPA2 is still safe for most homes. You can change this in your wireless settings under “Security” or “Encryption Type”.
Regularly Update Firmware
Router updates fix security holes and bugs. Just like your phone or laptop, your router needs updates too. Log in to your router, find the firmware or software update section, and check if there’s a new version. Keeping it updated protects you from known security problems.
Also Read Our Article: My User Agent: What It Is and How to Change It
Conclusion
Using 192.168.4.1 lets you take full control of your router settings, from changing passwords to improving security. Always double-check your login info, keep your router updated, and make sure your firewall settings don’t deny access. A few simple steps can keep your network safe and your internet running smoothly every day.


