
192.168.124 is an IP address used by many home and office routers. If you want to control your internet and devices, you need to know how to use this address to open your router’s settings. In this post, you will find easy steps to help you change your Wi-Fi name, set passwords, give devices their own addresses, and keep your network safe and working well.
192.168.124.0/24 Private IP Network
IP addresses are important for networks. The 192.168.124.0/24 range is a private address used only inside homes, offices, and businesses. It cannot be used on the public internet. This helps devices in the same network communicate with each other safely.
Accessing the Router Admin Panel via 192.168.124.1
To manage your home or office network, the first important step is to open your router’s admin page. This page lets you control how your internet works, which devices can connect, and how safe your network is. If your router uses 192.168.124.1 as its default address, here is an easy step-by-step explanation.
Step-by-Step Guide to Access the Admin Interface
To make changes to your network, you need to open the router’s admin page first. This page is where you control all the settings for your internet and devices. Follow these easy steps to get there.
Connect to Your Network
Before you can make any changes, your device must be connected to the router. You can either connect using Wi-Fi or plug in via an Ethernet cable for a more stable connection. Avoid using mobile data, as that won’t allow access to the local IP interface.
Launch Your Web Browser
Open any browser like Chrome, Firefox, Safari, or Edge. In the address bar (not the search box), type 192.168.124.1 and press Enter. This address is the local IP used by your router to host the configuration panel.
Enter Login Credentials
A login window will appear asking for your username and password. Most routers ship with factory-set credentials. Try the following common combinations:
- Username: admin
- Password: admin
- Password: password
If those don’t work, look at the back or bottom of your router—there’s often a sticker showing the default login info. Alternatively, refer to the user manual or the manufacturer’s website.
Accessing the Dashboard
The router’s screen will appear after a successful login. This is the control center for everythin from Wi-Fi name and password to advanced settings like port forwarding, firewall rules, and parental controls.
Configuring Network Settings through the Admin Panel
Now that you’re inside the admin panel, you can tailor your network to meet your specific needs. These are the most commonly used settings:
Change Your Wi-Fi Name (SSID) and Password
Navigate to the wireless settings section. Here, you can rename your network (SSID) to something recognizable, like “Smith_Family_WiFi.” Don’t forget to change the password to a strong, unique phrase that combines letters, numbers, and symbols. This keeps unauthorized users out.
Enable or Configure DHCP
Devices on your network receive their IP addresses by DHCP (Dynamic Host Configuration Protocol).Make sure DHCP is turned on unless you have a specific reason to manage IPs manually. Also you can modify the accessible address pool to remain inside the 192.168.124.0/24 subnet, which normally spans from 192.168.124.2 to 192.168.124.254.
Also Read Our Article: 192.168.50.57 How to Login, Setup & Fix Router Issues
Adjust IP Address Range
Under DHCP settings, you can define the start and end range for dynamic IP allocation. For example, you may limit DHCP to 192.168.124.100–192.168.124.200, reserving other addresses for static assignments like printers or servers.
Configure DNS Settings
Domain names, such as google.com, are transformed into IP addresses by the DNS (Domain Name System). You can use custom DNS servers such as Google DNS (8.8.8.8 and 8.8.4.4) or Cloudflare (1.1.1.1) for faster browsing and better reliability.
Enhancing Network Security
Securing your router is just as important as locking your front door. Many cyber attacks begin with unsecured routers, so here’s what you should do:
Update the Firmware Regularly
Firmware upgrades are released by manufacturers to address security flaws and problems. In your router’s menu, look for the “Firmware Update” or “Software Upgrade” option. Then, follow the on-screen directions. Always back up your settings before updating.
Use WPA3 or WPA2 Encryption
Under wireless security settings, select WPA3 if available, or WPA2-PSK (AES) as the next best choice. These encryption standards prevent outsiders from intercepting your Wi-Fi data.
Change Default Admin Credentials
Never leave your router’s login as “admin/admin.” Change it to a unique username and strong password to block unauthorized access to your configuration panel.
Disable WPS (Wi-Fi Protected Setup)
WPS may make it easy to connect new devices, but it also opens a backdoor for attackers. Unless you specifically need it, it’s safest to turn it off.
Enable MAC Address Filtering
Using their MAC addresses, you can compile a whitelist of permitted devices. This ensures that only known devices can connect—even if someone knows your Wi-Fi password.
Assigning Static IP Addresses within 192.168.124.x Range
Some devices work best when they have a fixed IP address instead of one that changes every time they connect to the network. Devices like printers, smart TVs, file servers, or security cameras often need this to work smoothly and be easy to find on the network. Giving these devices a static IP address means they always use the same address, which helps avoid connection problems.
Log Into the Router
To begin, open a web browser on any device connected to your network.Enter 192.168.124.1 in the address bar and hit Enter. Many routers frequently use this IP address as their default gateway. Once the page loads, you’ll be asked to enter your router’s login details. These are usually printed on the router itself or provided in the manual. If you haven’t changed them, the default username is often something like “admin” and the password might be “admin” or “password.”
Navigate to LAN Settings
After you log in, you’ll see the router’s main control panel. The exact layout depends on the brand and model, but look for a section labeled “LAN Settings,” “DHCP Settings,” or “Address Reservation.” This is where your router manages how it gives IP addresses to devices on your network. DHCP (Dynamic Host Configuration Protocol) is what automatically assigns IPs to devices. But in this section, you’ll also find the option to assign specific IP addresses to specific devices permanently.
Add a New Static IP Entry
To assign a static IP, you need to know the MAC address of the device you want to configure. A device on the network is identified by its MAC address, a special identifier composed of letters and numbers.You can usually find this in the device’s settings, on a label, or by checking the connected devices list in your router’s interface.
Save and Apply Settings
After entering the MAC address and your chosen IP, double-check everything for accuracy. Then click the “Save,” “Apply,” or “Add” button—whatever your router calls it. Some routers might ask you to restart the router or the connected device for the changes to take full effect.
Troubleshooting Common Connectivity Issues
Even the most stable home or office networks can sometimes run into problems. Whether it’s a sluggish connection or an inaccessible admin panel, resolving network issues often just requires a systematic approach. If you’re using a router with the IP 192.168.124.1, here’s how you can diagnose and fix the most common issues:
Cannot Access the Admin Panel
If you’re unable to reach your router’s configuration page by typing http://192.168.124.1 into your browser, try these steps:
- Check Your Connection: Make sure you’re actually connected to the router, either via Wi-Fi or a direct Ethernet cable. A weak or disconnected signal will prevent access.
- Confirm the IP Address: Double-check that you’re entering the correct IP. A simple typo—like using commas instead of periods—can stop you from connecting.
- Try a Different Browser or Device: Occasionally, browser caching or settings might cause issues. Switch to another browser or device and attempt access again.
Forgotten Login Credentials
- Check the Router Label: Many routers have a sticker on the back or underside listing the default username and password. Try using those if you haven’t changed them.
- Factory Reset: If you’ve modified the login and forgotten it, you’ll need to perform a reset. Press and hold the reset button on the router for around 10 seconds. This will restore factory settings, allowing you to log in using default credentials—but note that it will also erase any customized settings.
IP Address Conflicts
An IP conflict happens when two devices on the network are assigned the same IP address.This may lead to sporadic or complete disconnections.
- Avoid Manual IP Overlap: If you’re assigning static IPs manually, make sure no two devices have the same IP.
- Examine the DHCP configuration: Examine the DHCP configuration by logging into the admin panel. Ensure your static IPs fall outside the DHCP range to prevent overlap.
Slow Network Performance
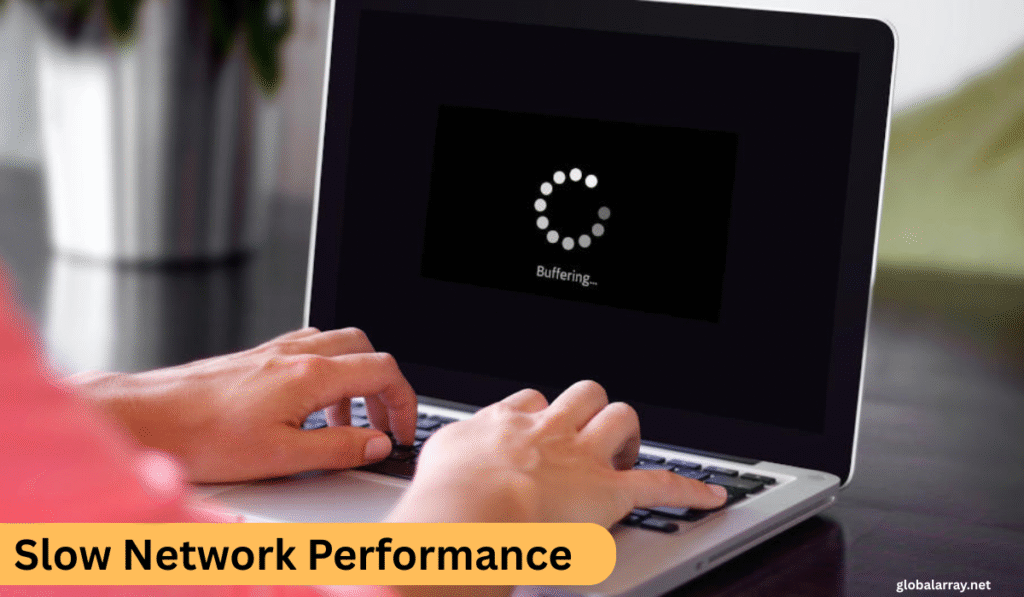
If your videos keep buffering or games feel slow and unresponsive, there are a few things you can do to improve your internet connection. Start by checking if your router needs an update. Newer versions often fix problems that can slow things down. You should also look at how many devices are connected at the same time. Too many phones, laptops, or smart gadgets can stretch your internet thin.
Try disconnecting the ones you’re not using. Another important step is making sure your router is placed in a good spot. Put it somewhere high up and in the middle of your home away from thick walls, kitchen appliances, or anything metal that might block the signal. These steps can help your internet run more smoothly without needing any extra tools.
Subnetting and the 192.168.124.0/24 Range
If you want to manage devices on your network properly, it helps to understand how IP addresses are grouped. In the 192.168.124.0/24 network, the “/24” part means the system uses a mask of 255.255.255.0. This gives:
- 256 total IP addresses (from 192.168.124.0 to 192.168.124.255)
- 254 usable addresses for devices, because the first and last are kept for special use
This setup works well for homes and small offices. It gives enough room for many devices without being too hard to handle. Everything stays organized, which makes it easier to check devices, fix issues, and avoid mistakes during setup.
Comparing 192.168.124.x with Other Private IP Rang
| Private IP Range | CIDR Notation | Total IP Addresses | Common Use Case |
|---|---|---|---|
| 10.0.0.0 – 10.255.255.255 | /8 | 16,777,216 | Large enterprises or wide multi-branch networks |
| 172.16.0.0 – 172.31.255.255 | /12 | 1,048,576 | Medium-sized businesses or institutional networks |
| 192.168.0.0 – 192.168.255.255 | /16 | 65,536 | Homes and small office networks |
| 192.168.124.0 – 192.168.124.255 | /24 | 256 (254 usable) | Small setups with fewer than 255 devices |
Best Practices for Maintaining a Secure and Efficient Network
Creating a reliable and safe network doesn’t end after initial setup. Ongoing maintenance and proactive security measures are key. Here are some expert-recommended best practices:
Keep Your Firmware Up-to-Date
Hackers often exploit known vulnerabilities in router firmware. Always update your firmware when notified or schedule periodic checks through the admin panel.
Monitor Connected Devices
Access your router’s client list every so often to ensure only authorized devices are connected. Unexpected devices could indicate someone is accessing your network without permission.
Enable Guest Network Access
Creating a guest Wi-Fi network allows visitors to use the internet without accessing your main network and devices. This is an excellent way to contain security risks.
Use Quality of Service (QoS) Settings
QoS allows you to prioritize bandwidth for specific tasks—such as giving your Zoom calls or video streams higher priority than background downloads. This leads to smoother performance during high-demand usage.
Backup Your Router Configuration
Once you’ve customized your router settings, export and save the configuration file. If the router resets or you upgrade to a new device, restoring your settings will be quick and easy.
Also Read Our Article: How to Use 172.30.1.1 for Home and Office Networks
Conclusion and Additional Resources
Using the 192.168.124.0/24 private IP range makes it easier to keep your home or office network running smoothly and securely. By keeping an eye on connected devices, updating your router when needed, and following simple settings steps, you can avoid common problems and keep everything working the way it should.
FAQS
How do I find my 192.168 username and password?
You can usually find the default username and password on a sticker on your router. Common defaults are “admin” for both fields. If it was changed, you’ll need to ask the person who set up the router or reset the device.
What is the 192.168 0.1 password change password?
To change the password, go to a browser and enter 192.168.0.1. Log in using the current admin details. Then look for the settings menu to update the admin or WiFi password.
Is 192.168 1.2 a private IP?
Yes, 192.168.1.2 is a private IP address. It belongs to the 192.168.0.0/16 range, which is reserved for local networks. It is not accessible from the public internet.
What is the default login for D-Link DSL 124?
For many D-Link DSL 124 routers, the default username is “admin” and the password is also “admin” or left blank. You can also check the label on the router for exact details
What is the 192.168 1.2 password change WiFi password?
Go to 192.168.1.2 in your browser, log in with your router’s details, then find the Wireless or WiFi settings. There you can set a new password for your wireless network.
How to get private IP?
To see your device’s private IP, go to your network settings. On Windows, use the command ipconfig in Command Prompt. On phones, check under WiFi settings.
How to change WiFi password?
Open a browser and enter your router’s IP (like 192.168.1.1). Log in, then go to the wireless settings. Change the password and save your changes.
What is my private IP online?
Private IPs are only visible within your local network. You can’t see it directly online, but tools like ipconfig (Windows) or WiFi settings (mobile) will show it.
What is the 192.168 1.1 password change WiFi password?
Type 192.168.1.1 in a browser, log in using your router’s details, then go to WiFi or wireless settings. Enter a new password and save it.
Is 192.168 always private?
Yes, all IPs starting with 192.168 are part of a private IP range. These addresses are used inside local networks and don’t work on the internet.


